

I’ve been growing broccoli in my garden for several years now—and here’s the truth: I almost gave up on it after a couple of disappointing spring crops. The weather would heat up too fast, the plants would bolt, and I’d be left with more frustration than florets.
But once I gave fall planting a shot? Game-changer. I’ve had much better luck growing broccoli in my fall garden, and I think you might, too.
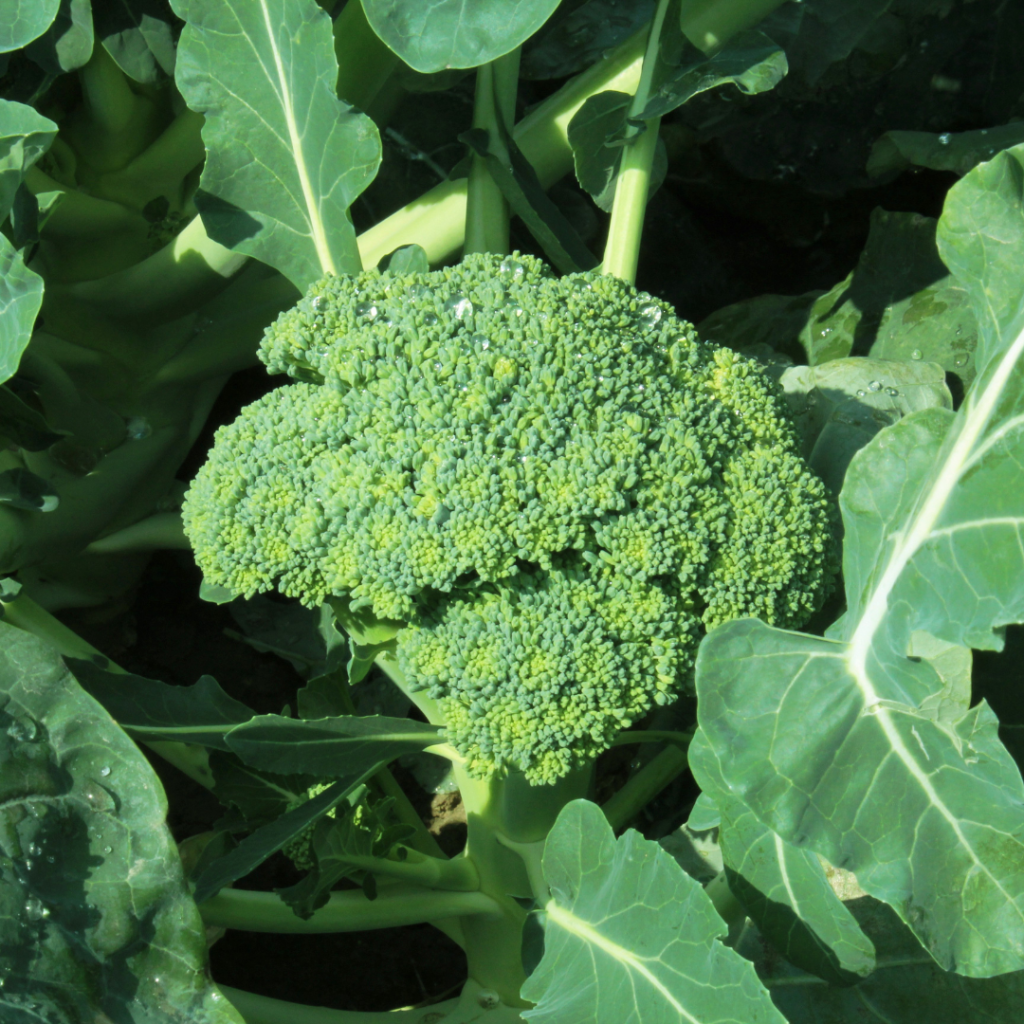
Broccoli thrives in the cooler temps of fall. Not only does it grow better, but it’s also less likely to bolt (go to flower) before you get a good harvest.
✔️ Fewer Pests
Common broccoli pests like aphids and cabbage worms slow down in fall, making pest control much easier.
✔️ Longer Harvest Window
If the weather cooperates, your fall-planted broccoli might produce well into early winter. You may even get bonus side shoots after the main head is harvested.
✔️ Sweeter, Better Flavor
Broccoli grown in cooler weather tends to be more tender and less bitter. The flavor is noticeably better than spring-grown broccoli, especially after a light frost.
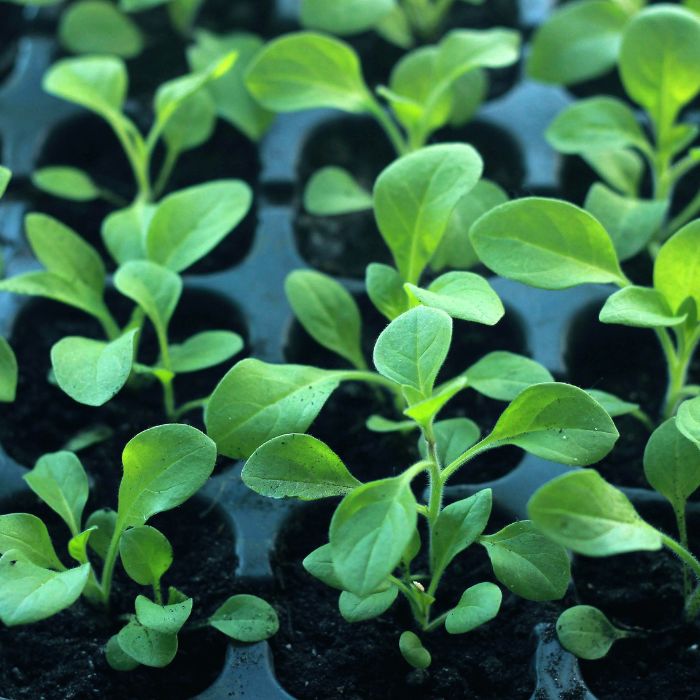
How to Start Broccoli Seeds Indoors (and Why You Should)
While buying transplants is an option, starting broccoli from seed indoors gives you more variety to choose from—and it’s surprisingly easy!
Here’s what you need to know to get your broccoli off to a strong start:
When to Start Seeds
-
In cooler climates, start seeds 8–10 weeks before your first frost date.
-
In warmer areas, 6–8 weeks is usually enough.
Tip: Always check the days to maturity on your seed packet—if you’re getting a late start or your first frost comes earlier in the season, choose faster-maturing varieties to make sure your broccoli has time to grow before the cold sets in. If you have a choice of seedlings from the nursery, check the tag for dates to maturity also.
Broccoli is a cool-season crop, and the seedlings need time to mature before freezing weather hits. The goal is to have strong transplants ready to go in the ground 4–6 weeks before your first frost.
🌡️ Soil Temperature and Setup Tips
-
Ideal soil temp for germination: 65–75°F (18–24°C)
-
Broccoli does not need a heat mat—in fact, overly warm temperatures can slow down germination or lead to leggy, weak seedlings.
-
Use a quality seed-starting mix, not potting soil—it’s lighter and drains better.
-
Lightly cover the tray with a humidity dome or plastic wrap to retain moisture until the seeds sprout. Remove the cover once you see green shoots.
💡 Light and Growing Conditions
-
Place your trays in a bright window or under grow lights.
-
If using a windowsill, rotate the tray daily to prevent the seedlings from leaning toward the light.
-
Keep the soil consistently moist but not soggy. A spray bottle or gentle watering helps avoid disturbing tiny seeds.
Once seedlings have two sets of true leaves, you can begin hardening them off about a week before planting them outside.
Take them outside for a few hours each day, gradually increasing time and sun exposure so they’re ready for life in the garden.
Planting and Caring for Fall Broccoli
Once your seedlings are ready, it’s time to get them in the ground.
Planting
-
Soil: Amend with compost or aged manure before planting. Broccoli loves rich, well-draining soil.
-
Depth: Plant at the same depth as in the container.
-
Mulch: Add a layer of compost or straw mulch to retain moisture and suppress weeds.
Spacing
Space plants 12–18 inches apart to give them room to grow and prevent airflow issues (which can lead to disease). In square foot gardening, its 1 plant per square. As they start to grow, you can plant leaf lettuce underneath.
Watering
Use the finger test: Stick your finger into the soil. If it feels dry past the first inch, it’s time to water.
Always water at the base of the plant to avoid disease and aim for deep watering to encourage a strong root system.
Fertilizing
I skip fertilizing at planting time since the compost does the job. But once the heads are about the size of a quarter, I give them a boost with an organic vegetable fertilizer like Dr. Earth or Fox Farm.
These have added soil microbes that help your plants absorb nutrients and water—making them stronger and more resilient.
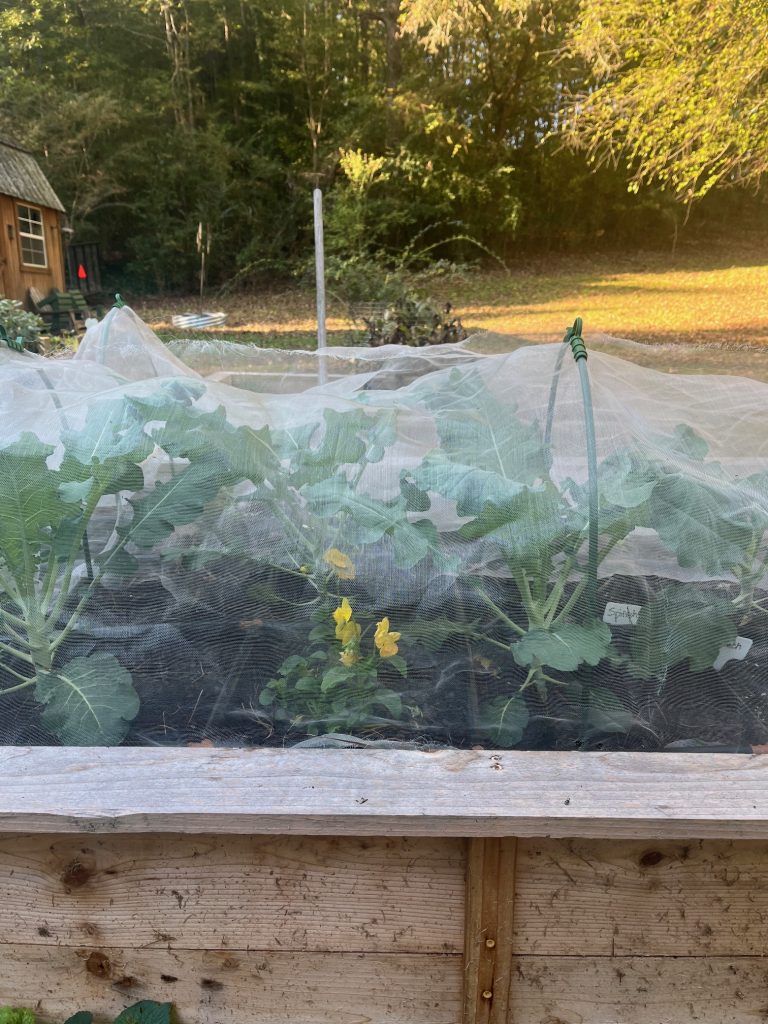
🐛 Pest Protection
Even in fall, don’t let your guard down. The cabbage moth can still sneak in and lay eggs. I learned the hard way—woke up one morning to chewed-up leaves and tiny green worms.
Now I always cover my plants with insect netting right after transplanting. It’s the only sure way to keep the moths out. Since you don’t have to worry about pollination, you can leave the netting on until cold weather.
Harvesting Your Broccoli
-
When to Harvest: Pick the heads while they’re tight and firm. Don’t wait too long or the florets will start to open.
-
How to Cut: Use a sharp knife and cut just below the head.
-
Keep It Going: After harvesting the main head, leave the plant in the ground. Side shoots will continue to grow for weeks.
Storing Broccoli: Fresh or Frozen
In the Fridge
-
Trim and rinse under cold water.
-
Dry thoroughly.
-
Store in a sealed container or plastic bag in the crisper drawer. Use within a week.
In the Freezer
-
Blanch florets in boiling water for 2–3 minutes.
-
Immediately place them in ice water to stop cooking.
-
Drain well, pat dry, and freeze.
Tip: Freeze individual florets on a tray before bagging to prevent clumping.
Not sure when or what to plant this fall? Let me do the planning for you! With my custom Fall Garden Planning Service, you’ll get a done-for-you layout tailored to your space, frost date, and garden goals—so you can grow with confidence.
👉 Spots are limited—book your consult now! $99 Go to GrowingwithGardenchick to get the details and book your consult.
Happy Fall Gardening!
Karen